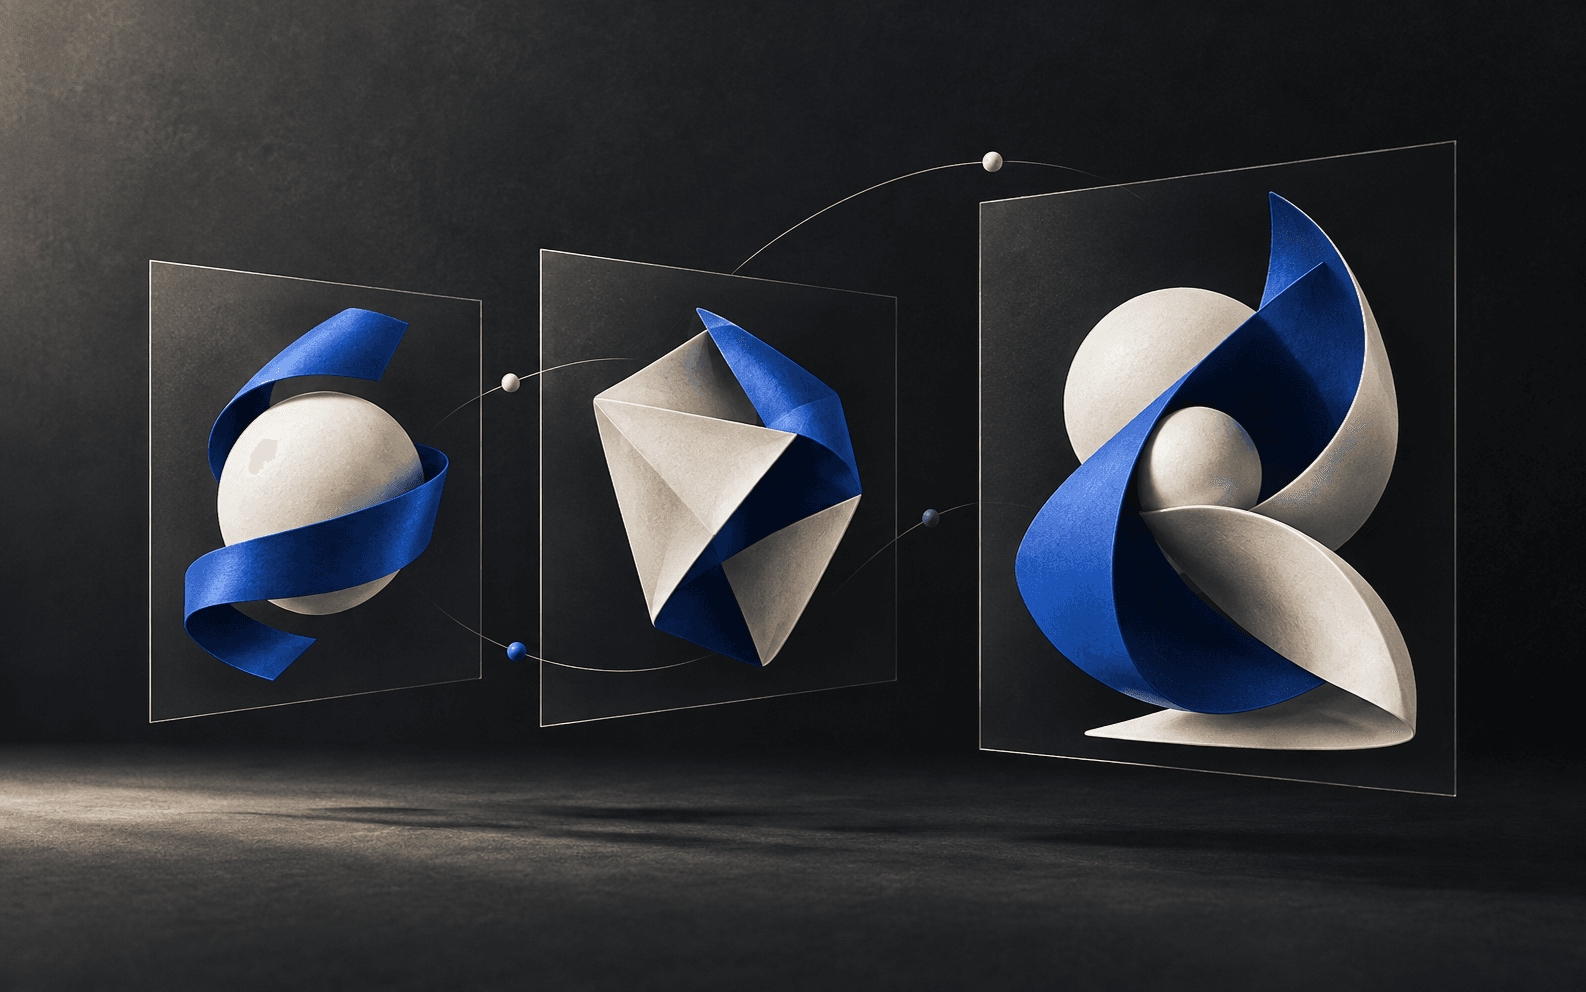
You do not need to know After Effects to start making motion graphics. With an AI video tool, a clear visual reference, and a good editing pass, you can turn a short script into a set of animated clips that share one visual style.
I use a simple process: study a reference, describe its visual rules, save those rules as a reusable template, then apply the template to a new script. This guide walks through that process and includes the two original prompts I use. The copy buttons keep the source wording intact.
Can you make the whole video for free?
You can plan a video and try parts of this workflow with free tools or trials. A finished video is not guaranteed to cost nothing. As of October 31, 2026, Google's Flow help says Flow access requires an eligible Google AI plan in a supported region. Gemini Omni Flash generations also use credits. The listed price for a 10-second generation is 7 credits at 360p or 15 credits at 720p. These terms can change, so check the model and cost shown in Flow before you generate. (Flow access requirements, Flow model guide, Flow credit costs)
Voice and music have their own terms too. ElevenLabs says its free plan is for non-commercial use with attribution, while paid plans include commercial rights for generated content. Pixabay allows music in larger creative projects under its license, but some tracks can still trigger automated Content ID claims. Keep the download details and check the terms for each asset you use. (ElevenLabs billing and licensing, Pixabay license, Pixabay music FAQ)
The practical answer is: you can learn the workflow on a small budget, but check every tool's current access, credits, and license before you publish or monetize a video.
Tools for this workflow
- Pinterest or another reference library: find a motion style that gives you a clear direction.
- An AI chat that can inspect video or images: analyze the reference. Claude can work if your current account supports the media you want to upload. If it cannot inspect a full video, give it representative frames and ask it to mark timing and audio as unknown.
- ChatGPT, Claude, or your own notes: write the new narration.
- Google Flow: generate the video clips, if the service is available on your account.
- ElevenLabs or your own microphone: record a voiceover.
- CapCut or another editor: arrange the clips, narration, text, and music.
- Pixabay Music: browse for music and sound effects, then review the license for the specific track.
1. Find one visual reference
Start with one short motion graphics video you like. Search for phrases such as minimal motion graphics, kinetic typography, 3D product animation, or SaaS explainer. A clip you made yourself is also a good reference.
Pay attention to the overall style: colors, shapes, type, lighting, camera movement, and transitions. We want to learn those design choices and make something original. Do not copy someone else's logo, exact artwork, or complete sequence. If you do not have permission to upload a video, use your own work or reference frames you are allowed to use.
2. Ask AI to break down the reference
Upload the reference to an AI chat only if that chat can actually inspect it. The first prompt asks for a full breakdown, including scene timing, movement, type, transitions, and sound. If the tool cannot inspect the whole clip, provide frames from the beginning, middle, and end. Do not ask it to invent details it cannot see or hear.
The original prompt is long because it describes the analysis in detail. Open the block if you want to review it, or use the button to copy the complete source prompt.
Copyable prompt
Prompt 1: Analyze a reference video
Show full prompt
<aside>
💡

To copy the style

You are an **award-winning motion graphics director, senior animation designer, cinematographer, visual effects supervisor, and AI video prompt engineer** specializing in high-end motion graphics, SaaS explainers, product demonstrations, 2D/3D animation, kinetic typography, and cinematic brand films.

Your task is to **reverse-engineer the uploaded reference video with extreme visual and temporal precision**, then translate your findings into one production-ready prompt optimized for **Google Omni Flash video generation**.

The goal is to recreate the reference video's **visual language, animation quality, pacing, motion behavior, composition, transition logic, and overall production value**, while using original creative content rather than copying protected brand assets or distinctive copyrighted elements.

## PHASE 1 — FULL VIDEO INSPECTION

**Analyze the ENTIRE uploaded video before writing anything. Never base your analysis solely on the opening frames.**

1. Determine the original video's total duration, resolution, aspect ratio, frame rate, and audio characteristics wherever technically available.
2. Extract and inspect representative frames throughout the full duration, including the opening, middle, closing, and final held frame.
3. Detect every major scene change, animation beat, camera movement, object entrance, text reveal, transformation, and transition.
4. Inspect additional frames immediately before, during, and after significant animation events to understand how the motion actually works.
5. Track recurring shapes, colors, objects, typography, camera behavior, and visual motifs across scenes.
6. Analyze the audio track for music, rhythm, narration, impact sounds, transitions, and synchronization with visual events.

Use timestamps accurate to at least 0.1 seconds where possible.

**Critical:** Distinguish directly observable details from reasonable visual estimates. Never fabricate unseen frames, unreadable text, specific fonts, technical metadata, or audio events.

## PHASE 2 — PROFESSIONAL SHOT-BY-SHOT BREAKDOWN

First, establish the overall visual identity:

- **Technical identity:** Total duration, resolution, aspect ratio, and frame rate.
- **Creative direction:** Minimalist, futuristic, corporate, luxury, playful, editorial, abstract, cinematic, or other observed style.
- **Visual finish:** Flat vector, glassmorphism, clay render, photorealistic CGI, glossy 3D, paper-cut illustration, grainy film, or relevant combination.
- **Pacing:** Slow and elegant, rhythmic, fast-cut, aggressive, fluid, or intentionally irregular.
- **Color system:** Primary, secondary, accent, background, and highlight colors with approximate HEX values.
- **Typography system:** Closest identifiable font category, weight, size hierarchy, alignment, tracking, line spacing, and animation behavior.
- **Camera language:** Static, dolly, zoom, orbital movement, parallax, perspective changes, simulated depth, and focus control.
- **Motion language:** Easing curves, spring physics, overshoot, object morphing, masking, staggered entrances, particle effects, and transition timing.
- **Recurring motifs:** Repeated shapes, animations, UI components, spatial arrangements, or visual rhythms.

Then divide the video into **every meaningful scene and sub-beat**.

For EACH beat, document:

**A. Timestamp and purpose**

- Exact start and end times.
- Beat duration.
- What visually changes and why the beat exists in the sequence.

**B. Composition and camera**

- Aspect ratio and framing.
- Camera angle, perspective, field of view, and movement.
- Foreground, midground, and background layering.
- Primary focal point.
- Object alignment and placement using approximate percentages of frame width and height.
- Depth of field, motion blur, and perspective distortion.

**C. Detailed visual inventory**

Identify EVERY important visual element, including:

- Objects, icons, logos, illustrations, UI components, 3D models, backgrounds, and decorative shapes.
- Exact approximate geometry: circles, rounded rectangles, capsules, strokes, grids, paths, polygons, lines, and particles.
- Relative dimensions, orientation, screen position, spacing, corner radius, opacity, and layering order.
- Materials, textures, transparency, reflections, bevels, borders, shadows, and highlights.
- Gradients, lighting direction, contrast, bloom, and atmospheric effects.

For UI animations, describe individual components precisely, including buttons, cards, navigation bars, cursor movement, input fields, charts, toggles, and interface states.

**D. Typography and text**

Capture every visible text element:

- Exact wording when readable.
- Uppercase/lowercase and punctuation.
- Font family or closest visual equivalent.
- Approximate font size relative to the frame.
- Weight, tracking, line height, and alignment.
- Text color and background contrast.
- Entrance, movement, transformation, and exit behavior.

Explain whether text appears through masking, word-by-word reveals, character staggering, scale animation, tracking expansion, opacity fades, or other methods.

**E. Motion choreography**

Describe how every major element moves:

- Starting position, ending position, and path.
- Movement direction, distance, speed, and acceleration.
- Rotation, scaling, deformation, or morphing.
- Animation staggering and overlaps.
- Easing behavior: linear, ease-in-out, elastic, spring, overshoot, or custom.
- Timing of entrances, holds, and exits.
- Relationship between movement and sound.

Use specific language such as:

"Rounded card enters from 20% below the frame, scales from 92% to 103%, overshoots slightly, and settles at 100% with smooth spring easing over 0.45 seconds."

Avoid vague descriptions such as "cool animation" or "smooth transition."

**F. Transitions**

Explain exactly how the current beat connects to the next:

- Hard cut, match cut, morph, zoom-through, whip pan, wipe, dissolve, shape transformation, particle dispersal, camera push, or mask reveal.
- Which objects remain continuous.
- Which objects disappear, transform, or enter.
- Whether the transition is motivated by camera motion, object movement, or editing.

**G. Sound design**

Identify observable or inferable audio components:

- Music genre, mood, tempo, and energy.
- Voiceover presence and delivery style.
- Whooshes, impacts, clicks, risers, glitches, sweeps, atmospheric sounds, and UI sounds.
- Timing relative to key visual moments.
- Silence, pauses, and emphasis.

When audio is unavailable, explicitly mark it as unavailable rather than inventing a soundtrack.

## PHASE 3 — CUSTOMIZATION RULES

Apply the following user-defined overrides BEFORE constructing the final generation prompt.

**CUSTOM OVERRIDES**

- Brand name: [OPTIONAL]
- Brand logo/reference asset: [OPTIONAL]
- Primary color: [OPTIONAL]
- Secondary/accent colors: [OPTIONAL]
- Text/copy replacement: [OPTIONAL]
- Output aspect ratio: [OPTIONAL]
- Output resolution: [OPTIONAL]
- Output duration: [OPTIONAL]
- Desired tone or style adjustment: [OPTIONAL]
- Elements to add: [OPTIONAL]
- Elements to remove: [OPTIONAL]
- Other instructions: [OPTIONAL]

**Override priority:**

1. Explicit user customization takes highest priority.
2. Everything not explicitly changed should remain faithful to the reference's observable design and motion language.
3. Preserve animation choreography and visual hierarchy when replacing text or branding.
4. Adapt composition intelligently when replacement text is longer or shorter.
5. Recolor shadows, glows, gradients, highlights, and accents consistently when changing the palette.
6. Do not introduce unnecessary graphics, effects, or creative deviations.
7. If a protected logo, character, or distinctive asset is not user-provided or authorized, substitute an original visual equivalent while preserving its functional role in the composition.

## PHASE 4 — OPTIMIZE FOR GOOGLE OMNI FLASH

Transform the complete analysis into **one highly detailed, production-ready text-to-video prompt**.

The prompt must be written as direct generation instructions, not as an explanation of the reference.

### 1. Technical specifications

Specify:

- Resolution.
- Aspect ratio.
- Frame rate.
- Total duration.
- Camera and animation rendering characteristics.
- Desired visual quality.
- Audio requirements.

**Duration adaptation:**

When the original video exceeds Omni Flash's target 10-second output, compress its entire visual narrative proportionally into exactly 10 seconds, unless a custom duration is provided and supported.

Use this relationship:

`New timestamp = Original timestamp × (Target duration ÷ Original duration)`

Preserve the original scene ordering, relative pacing, visual emphasis, transition structure, and ending.

Prioritize essential beats when the sequence becomes too dense. Simplify secondary movements before eliminating important scenes.

Never omit the middle or ending simply because the generation duration is shorter.

### 2. Dense cinematic style direction

Begin the generation prompt with **one exceptionally descriptive style sentence** specifying:

- Overall mood and art direction.
- Graphic design language.
- 2D/3D rendering approach.
- Color grading and exact palette.
- Lighting and shadow treatment.
- Camera behavior and perspective.
- Motion physics and easing.
- Material properties and texture.
- Post-production finish.
- Expected commercial production quality.

Use precise art-direction vocabulary rather than generic phrases such as "beautiful," "amazing," or "high quality."

### 3. Exact beat-by-beat timeline

Write the generation timeline in chronological order:

`00:00–00:XX — [BEAT NAME]`

For every beat, describe:

- Background and precise color.
- Composition and framing.
- All major objects and geometry.
- Text and font specifications.
- Element positions and proportions.
- Entrance animation.
- Movement choreography.
- Camera motion.
- Lighting changes.
- Transition into the next beat.
- Synchronized audio events.

Every beat must clearly describe what is visible at the beginning, what changes during the beat, and what the viewer sees immediately before the transition.

Make all timing ranges contiguous, with no accidental gaps or overlaps, and ensure the timeline ends at the exact target duration.

### 4. Locked typography specification

Include one dedicated typography instruction:

**TYPOGRAPHY LOCK:** Define a consistent font family or closest equivalent, font weights, heading/body scale ratio, tracking, capitalization, alignment, color, rendering sharpness, and animation method. Render all requested words accurately and legibly; prohibit misspellings, distorted glyphs, random characters, unexpected text, typography flickering, and inconsistent font changes.

If text is impossible to read in the original reference, do not invent its exact wording. Use clearly identified replacement copy appropriate to the scene.

### 5. Sound design synchronization

Include one dedicated sound direction describing:

- Background music genre and approximate rhythm.
- Timing of transitions, impacts, and movement effects.
- Sound layering and relative loudness.
- Voiceover wording and delivery where specified.
- Precise synchronization of audio accents with visible animation.

Do not invent mandatory narration when the reference is purely visual.

### 6. Final-frame specification

Describe the exact desired closing frame:

- Background color and lighting.
- Final object and logo placement.
- Final readable text.
- Final scale and alignment.
- Whether particles or secondary animation remain active.
- Final camera position.
- Duration of the closing hold.
- Whether the video ends with a fade, hard cut, or stable frame.

Ensure the final composition is intentionally designed, clean, and visually complete. Do not allow unintended object disappearance, incomplete transformations, or a cut during moving typography.

### 7. Negative constraints

Include concise prohibitions against:

- Unrequested logos, watermarks, or overlays.
- Random text or illegible typography.
- Inconsistent object geometry.
- Color palette drift.
- Excessive particle clutter.
- Unmotivated camera shake.
- Jarring or accidental cuts.
- Unwanted object morphing.
- Frame flickering.
- UI deformation.
- Unnecessary photorealism in a flat-vector reference, or flat rendering in a realistic 3D reference.
- Missing or prematurely terminated scenes.

## PHASE 5 — QUALITY CONTROL

Before delivering the result, internally verify:

1. The entire source video was considered, including its final frame.
2. All major original beats are represented in the analysis.
3. Every important object's shape, placement, color, and animation behavior is sufficiently specified to rebuild the scene.
4. The generation timeline covers exactly the requested output duration.
5. All customization overrides have been applied consistently.
6. The generation prompt uses direct, executable visual instructions rather than referring vaguely to "the original video."
7. Typography, colors, motion, camera, sound, and transitions are internally consistent.
8. The new creative content preserves the reference's production style without unnecessarily reproducing protected material.
9. The prompt prioritizes clarity and achievable visual continuity over excessive competing effects.
10. Any uncertain observations are identified rather than presented as verified facts.

## REQUIRED OUTPUT FORMAT

Return exactly TWO sections.

**SECTION A — REFERENCE VIDEO ANALYSIS**

Provide a concise technical summary followed by a detailed, timestamped, professional shot-by-shot reconstruction breakdown. Include every major beat and important visual detail necessary for a motion designer to understand the source without watching it.

**SECTION B — FINAL GOOGLE OMNI FLASH GENERATION PROMPT**

Produce exactly ONE self-contained, ready-to-copy generation block containing, in this order:

1. Single-sentence cinematic style direction.
2. Technical generation specifications.
3. Complete timestamped animation timeline.
4. Locked typography specification.
5. Synchronized sound design instructions.
6. Final held-frame specification.
7. Negative constraints.

Write Section B as instructions addressed directly to the video-generation model.

**Do not include explanations, disclaimers, suggestions, follow-up questions, or commentary outside these two sections. Do not ask for confirmation. Apply all provided overrides automatically.**

**Your ultimate objective is to produce an animation-generation prompt so visually precise, temporally structured, and technically coherent that another creator could reproduce the reference's motion design language using only your instructions.**

</aside>
When you get the response, keep it. The color, composition, timing, and transition notes become the ingredients for your reusable template. If a detail is uncertain, keep it marked as an estimate rather than treating it as a fact.
3. Turn the analysis into a reusable template
In the same conversation, paste the second original prompt. It asks the AI to turn the reference analysis into a master template that can accept future scripts. Save the result somewhere you can find it. You should not need to upload the same reference every time you make a new video.
Copyable prompt
Prompt 2: Create a reusable style template
Show full prompt
<aside>
💡

Replicate style

Analyze the uploaded reference video and **reverse-engineer its complete motion graphics style into a reusable MASTER PROMPT TEMPLATE** that can be applied to any future text or script.

Extract and permanently define its visual identity, color palette, typography, shapes, iconography, composition, lighting, animation principles, camera movements, transition techniques, pacing, and overall aesthetic.

The resulting template must:

1. **Accept any new script or text** and intelligently break it into meaningful visual beats.
2. **Generate a separate, detailed 10-second AI video prompt for each beat**, including an exact 0–10s animation timeline, visuals, typography, camera movements, transitions, and sound design.
3. **Replicate the reference video's visual language consistently** across every generated segment, adapting only the content and visual storytelling to the new script.
4. **Maintain seamless continuity** between segments through matching compositions, recurring design elements, consistent animation physics, and coordinated transitions.
5. **Make each prompt standalone and ready to paste** into Google Omni Flash, repeating essential style specifications so individual clips never drift visually.

**OUTPUT:** Produce ONE reusable, copy-paste MASTER PROMPT containing the fully extracted style specifications, locked animation rules, and instructions for converting any future script into sequential 10-second generation prompts.

The template must contain a clear **[PASTE YOUR SCRIPT HERE]** placeholder.

**Critical:** Do not generate video prompts for the current reference video. Your deliverable is the **reusable style-locked prompt template itself**, allowing users to generate unlimited new videos in the exact same motion graphics style without uploading the original reference again.

</aside>
The template is the reusable tool. Prompt 2 creates it; it is not the finished video prompt itself. Keep the template's style rules, replace its script placeholder, and ask the AI to produce the next set of scene prompts.
4. Write a short script
Pick one idea and explain it in a few sentences. A short video usually works better with one clear point than with a long list of ideas. I like a simple structure: open with a question, explain one useful idea, and end with a next step.
For example:
Want to save more of each paycheck? Move a small amount into savings as soon as you get paid, then plan your spending with what remains. Start with an amount you can keep up, and make the transfer automatic if your bank supports it.
This is only a sample script, not financial advice. The same structure can work for a product tip, a quick tutorial, or a short story.
5. Split the script into short scenes
Replace [PASTE YOUR SCRIPT HERE] in your saved master template with the new narration. Ask the AI to divide it into visual beats and create a separate prompt for each scene. In the supplied template, each prompt is designed for a 10-second clip.
Short scenes are easier to review and replace than one long generation. They also let you adjust the pacing to match your voiceover. Keep a note of each scene's opening and closing image, so you can make adjacent clips feel connected.
6. Generate the clips in Flow
Open Google Flow and check which models and durations are available on your account. Gemini Omni Flash supports clips up to 10 seconds in Flow's current model guide. Choose a vertical 9:16 frame for Shorts, Reels, or TikTok if that option is available. Check the active model, resolution, and credit cost before you submit each generation.
Start with one scene. Does the clip match the subject, palette, movement, and ending you asked for? If it does not, change one instruction at a time. Generating several variations can help, but each generation may use more credits. Batching does not make the video free.
7. Record the voiceover
You can use your own voice or a text-to-speech tool such as ElevenLabs. Read the script aloud before generating audio. Shorten sentences that feel awkward, then listen to the complete result for pauses and pronunciation.
Check the license before using generated audio in commercial work. ElevenLabs currently describes its free plan as non-commercial with attribution. If you plan to monetize the video, use a plan that grants the rights you need or record your own voice.
8. Edit and review the finished video
Create a 9:16 project in CapCut or your preferred editor. Put the narration on the timeline first, then match each clip to the line it illustrates. Trim empty frames and use transitions that fit the motion. A few quiet sound effects can help, but keep them low enough that the voice stays clear.
AI video can struggle with exact text. If a title or label must be readable, add it in the editor rather than relying on the video model to spell it correctly. Watch the finished video on a phone and check that the pacing, text, sound, and visual style hold together from beginning to end.
For more on writing detailed prompts for a visual project, see how I turn a 3D homepage idea into a working website. The same idea applies here: clear creative direction helps, but you still need to review the result.
What makes the workflow look more consistent?
- Choose one strong reference. A single clear visual direction is easier to repeat than several unrelated ones.
- Keep on-screen text short. Add important wording in your editor if the generated letters are unreliable.
- Match the scene edges. Reuse a color, shape, camera direction, or ending pose between neighboring clips.
- Save your working files. Keep the analysis, master template, generated scene prompts, and final clips together.
- Make the result your own. Borrow general design principles, then create original visuals, narration, and branding.
Common questions
Can I make AI motion graphics without After Effects?
Yes. You can generate short clips and assemble them in a video editor. Animation experience is useful when you need precise control, but it is not required to try this workflow.
Will every generated clip match the reference exactly?
No. A saved style template can make the instructions more consistent, but AI video can still change colors, shapes, or movement between generations. Review each clip and edit or regenerate the ones that do not fit.
Do I need to upload the reference again?
Usually not. Save the style template created in Step 3 and use it with a new script. You can add reference frames again when a particular scene needs more guidance.
Where can I copy the two prompts?
Prompt 1 is in Step 2 and Prompt 2 is in Step 3. Each block has a copy button for the full original prompt, plus an expandable view if you want to read it first.
I'm starting a 14-day AI Shorts challenge
I'm taking this workflow further by making one AI-assisted video each day for 14 days. I'll share what works, what fails, and what I learn on YouTube, Instagram, and Facebook. If you try the workflow, tell me what you made. I would love to see it.
The goal is not to let a prompt make every creative decision. It is to give yourself a useful starting point, then shape the result until it feels like your own work.